
Condo & Multi-Unit
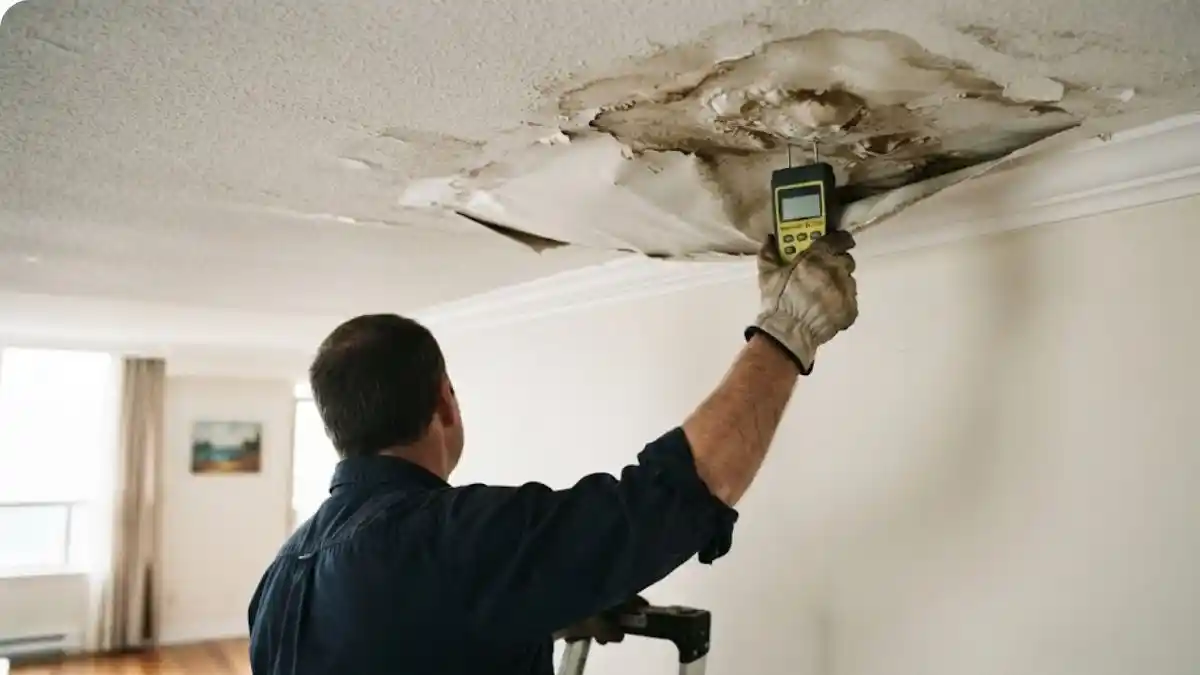
Ceiling water damage in a condo or multi-unit building almost always originates from somewhere other than where it appears. Water that enters your ceiling drywall may have traveled horizontally for several feet through a floor-ceiling assembly before finding a penetration point - an electrical box, a plumbing sleeve, a seam in the subfloor - and presenting as a stain or drip in a location that has no obvious relationship to the source. The restoration requires addressing where the water is, not just where it shows. Call (571) 741-6292 and we will map the full extent before any drywall comes down.
Water from the Unit Above - The Fairfax Condo Scenario
In Fairfax County's condominium communities - from the 1960s garden-style complexes in Annandale and Reston to the 2010s high-rises in Tysons and Merrifield - ceiling water damage from the unit above is a recurring event driven by a small set of recurring causes. The unit above's plumbing is aging. An appliance supply line fails. A toilet overflows and is not discovered quickly. Ice dams force water under flashing at the roofline and it travels down through the building. Each cause produces a different water-spread pattern and a different documentation requirement.
Unit-Above Water Sources and What They Mean for Your Unit
| Source | Water Category | Spread Pattern Below | Documentation Priority |
|---|---|---|---|
| Toilet overflow (upstairs unit) | Cat 2–3 depending on content | Concentrated near bathroom footprint; spreads through floor penetrations | Source confirmation critical - affects your remediation scope and HOA notification requirements |
| Washing machine supply-line failure | Cat 1 (clean supply water) | Wide spread from utility/laundry location; can migrate 10–15 ft horizontally above your ceiling | Upstairs owner's HO-6 claim; subrogation likely |
| Dishwasher overflow or drain failure | Cat 1–2 | Kitchen-footprint centered; penetrates at kitchen light fixtures and HVAC registers | Same as washing machine - upstairs appliance = upstairs owner's coverage |
| Ice dam (roofline intrusion) | Cat 1 | Follows roof deck slope; may appear in ceiling of top-floor units far from the ice-dam location | HOA master policy if roofline is a common element; governing documents determine coverage split |
| Upstairs plumbing leak (slow/hidden) | Cat 1–2 | Often presents as a recurring ceiling stain; actual saturation in floor-ceiling assembly is far greater than visible damage suggests | Date-of-discovery documentation matters; pre-existing versus new damage distinction affects claim |
Ceiling Cavity Saturation - What You Cannot See
The visible damage to your ceiling - the stain, the bubble, the drip - represents the last 10 percent of the water's journey. The floor-ceiling assembly between your unit and the one above consists of subfloor, structural framing (wood joists or concrete slab depending on building era), insulation, and your ceiling drywall. In wood-framed garden condos (common in Annandale, Reston's earlier phases, and Springfield), water wicks into subfloor panels, migrates through insulation batt, and saturates ceiling drywall over a wide area before any visible evidence appears. In concrete-slab construction (common in 1990s and newer mid-rise and high-rise buildings), water travels faster across the slab surface but accumulates at penetrations and in the air gap above suspended ceilings.
Moisture mapping with calibrated meters and thermal imaging before any ceiling drywall removal establishes the true extent of saturation. This matters for two reasons: it prevents you from tearing out only the visibly damaged drywall and leaving saturated framing in place (guaranteed mold in 10 to 14 days), and it gives you the documentation to support the full claim scope against the responsible party's insurance. Call (571) 741-6292 before you start pulling any ceiling material.
Documentation for HOA and Insurance Claims
When water damage originates in the unit above yours, you are dealing with at least three parties: yourself, the upstairs unit owner, and your condo association. Virginia's Condominium Act (§55.1-1900 et seq.) establishes the general framework, but the actual responsibility split is governed by your specific declaration and bylaws. The key documentation tasks are: confirming the source location (which determines who is responsible), establishing the date and timeline of the event, and recording the full extent of damage to your unit before any repair work begins.
We photograph all affected areas at the time of assessment with moisture readings overlaid, establish the source location or document that source confirmation is pending, and produce a damage record you can provide to your HO-6 carrier, the upstairs owner's insurer, or the HOA. We do not provide legal advice on responsibility - review your governing documents and consult your insurer for that. What we provide is the documentation that makes any of those conversations concrete. See our HOA vs. Owner Responsibility Checker for an educational framework, and our Insurance Claims Support page for the documentation process in detail.
Read more in our guide: Water Came Through My Ceiling from the Unit Above - What Fairfax Condo Owners Must Do First.
Ice Dam Water Damage in Fairfax County Condos
Ice dams form when heat loss through the roof deck causes snow to melt at the upper roof and refreeze at the colder eave - creating a dam that backs meltwater under shingles and flashing. In Fairfax County's colder winters, top-floor units in garden-style condos and townhome HOA communities see this pattern after extended cold periods followed by warming. The water entry point is typically at the eave edge and travels down the roof structure - appearing in ceilings a considerable distance inward from the exterior wall.
Ice dam intrusion is almost always a common-element roofing issue, which places initial responsibility with the HOA's master policy. However, damage to your interior finishes - drywall, flooring, personal property - falls under your HO-6 policy in most governing documents. The documentation process is the same: establish the source, map the full extent of saturation, and build the record before repair begins. Call (571) 741-6292.
Drying and Restoration Process
Once moisture mapping is complete and the source is controlled, ceiling drying follows a specific sequence: targeted drying in place where saturation is moderate and the assembly can be dried without demolition; ceiling drywall removal where saturation is severe or where the framing and insulation above must be accessed; structural drying of framing and subfloor above until target moisture content is reached; replacement of insulation if saturated beyond recovery; drywall replacement, tape, prime, and paint to match. For units with finished hardwood or engineered wood floors - common in Tysons and McLean condos - floor drying assessment runs in parallel since water reaching the floor from above can also migrate into the floor assembly below.
Related Scenarios
- Appliance flood from the unit above - see Appliance & Water Heater Flood for detail on washer, dishwasher, and water heater events in multi-unit buildings and what they typically mean for units below.
- Multi-floor vertical spread - if water has moved through more than one floor level, see Emergency Water Removal for the full extraction and structural drying protocol.
- Sewage component from upstairs unit - if the upstairs event involved a toilet overflow with sewage content, the water reaching your ceiling may be Category 3. See Sewage Backup Cleanup for the biohazard handling protocol.
- Mold found in ceiling cavity - if the water intrusion was slow and long-running, mold may already be present. See Mold Remediation for the containment and remediation process.
Ceiling Water Damage FAQ
-
Place buckets or towels under the drip and move any valuables or electronics out of the affected area. Call (571) 741-6292. Notify your property manager or HOA emergency line and try to contact the unit above - the source needs to be shut off before extraction can fully begin. Do not puncture the ceiling drywall to release pooled water unless the ceiling is visibly bulging under pressure and at risk of collapse - let us assess the structural situation first. Document with photos and video before any material is disturbed.
-
No. Water damage in floor-ceiling assemblies progresses rapidly - mold can establish in 48 to 72 hours under the right conditions. Start drying immediately through your own HO-6 policy. Your insurer will subrogate against the responsible party's coverage after the fact. The cost of waiting for liability to be resolved is always greater than the cost of starting immediately. Call (571) 741-6292.
-
Visible mold on the surface of ceiling drywall is confirmation, but mold inside the floor-ceiling assembly above the drywall is not visible without opening the ceiling. Indicators include persistent musty odor in the affected room after the visible damage has dried, new allergy or respiratory symptoms in occupants, or a prior water event in the same location that was not fully dried. If the current event occurred in a location with known prior water damage, mold assessment before ceiling drywall removal is warranted. See our Mold Inspection & Testing page.
-
The starting point is your governing documents - the declaration and bylaws define responsibility by location of the source and type of element (common element vs. limited common element vs. interior). We can provide: dated photographs of all affected areas with moisture readings, a written assessment of the apparent source location, and a timeline of the event. That documentation - combined with your governing documents - is what your attorney or public adjuster will use if a dispute proceeds. We do not provide legal advice, but we can produce the factual record that any dispute requires. Call (571) 741-6292.